It has happened or will happen to all of us. That trusty little diesel drops rpm, runs rough, and then, oh no... it dies. This doesn't happen at the dock or the middle of the bay. It happens when you are anchoring off a lee shore with 6 foot rollers and 20 knots of wind or slowly navigating a small channel filled with expensive toys.
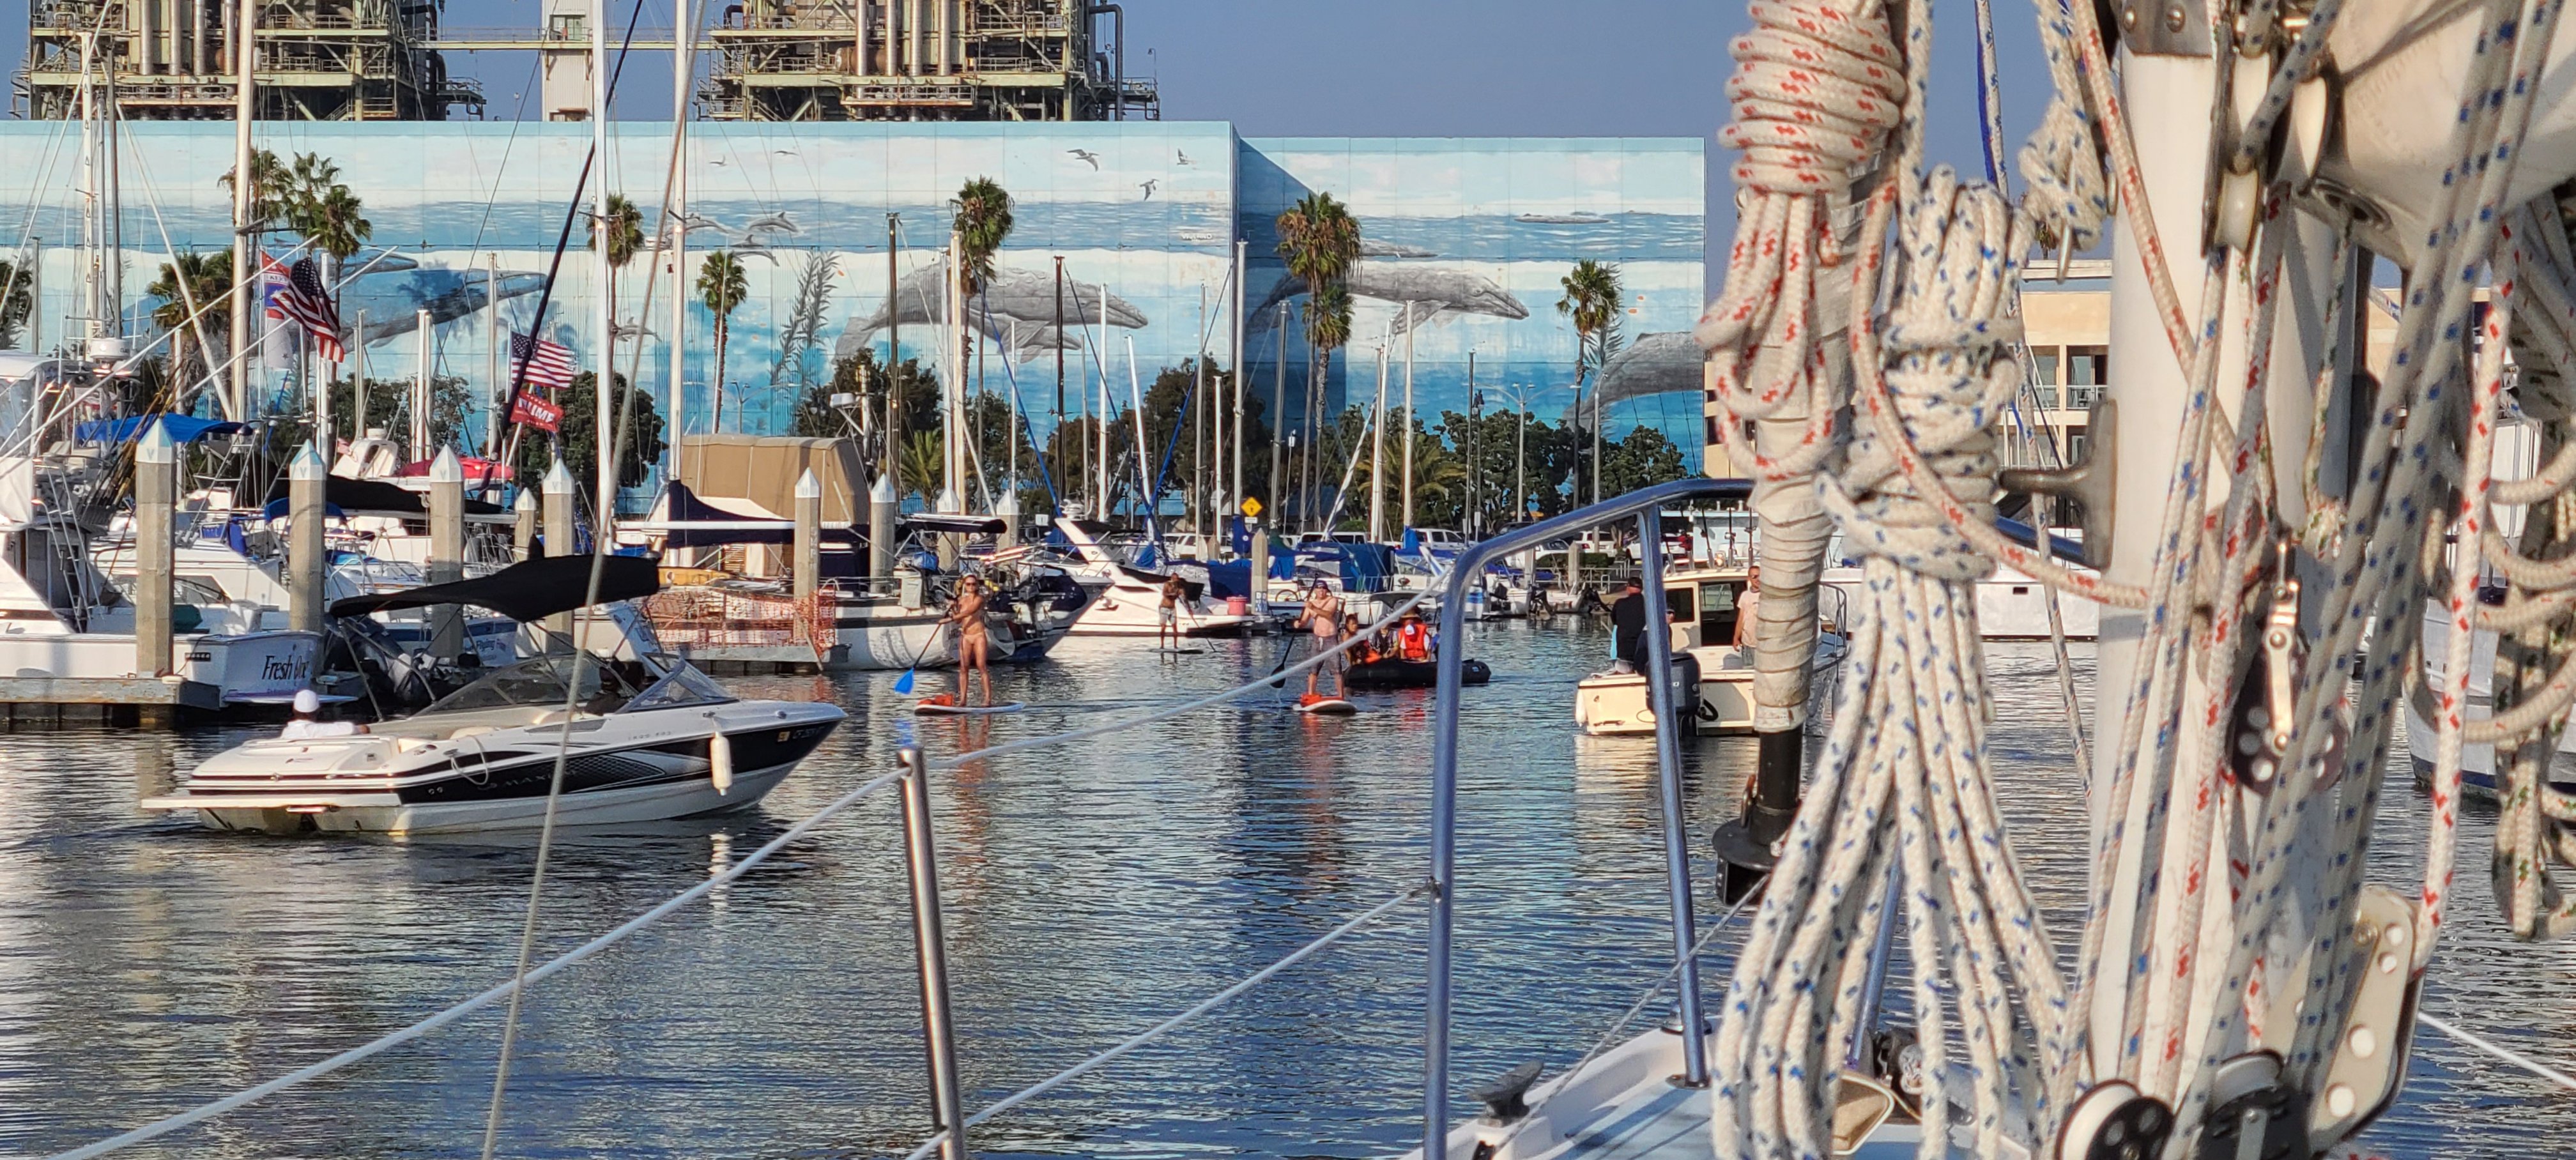
- 1-20200816_180100.jpg (1.45 MiB) Viewed 7388 times
So what do you do? Do you turn the helm of 10,000 pounds of out of control plastic over to the mate, say "good luck", and dive into the engine compartment? Trust me,you'll hear about
that later. We have figured a solution that has worked for us and saved some unpleasant discussions. First we need to identify what the problem is (the mate added that the problem is the freaking engine died and she has a good point). Diesels are wonderful engines, once you get them started they will go and go unless you remove one of two components; air and fuel. The first thing to check and permanently fix is any restricted airflow. We sealed our engine compartment so all the air is coming in through the clamshell vents. If the engine is to be run under any strain or for a long time we turn on the blower to suck cool fresh air into the engine compartment. If you have a air filter check it and change it. Many boaters have just taken off the old style air cleaners and put on disposable cone filters. They are cheap and available in almost any throat size. Air is most likely not the problem. Its fuel... crud in the fuel...air in the fuel...not enough fuel. So you run a preliminary check on the fuel system.
- 1-20200917_111328.jpg (70.75 KiB) Viewed 7388 times
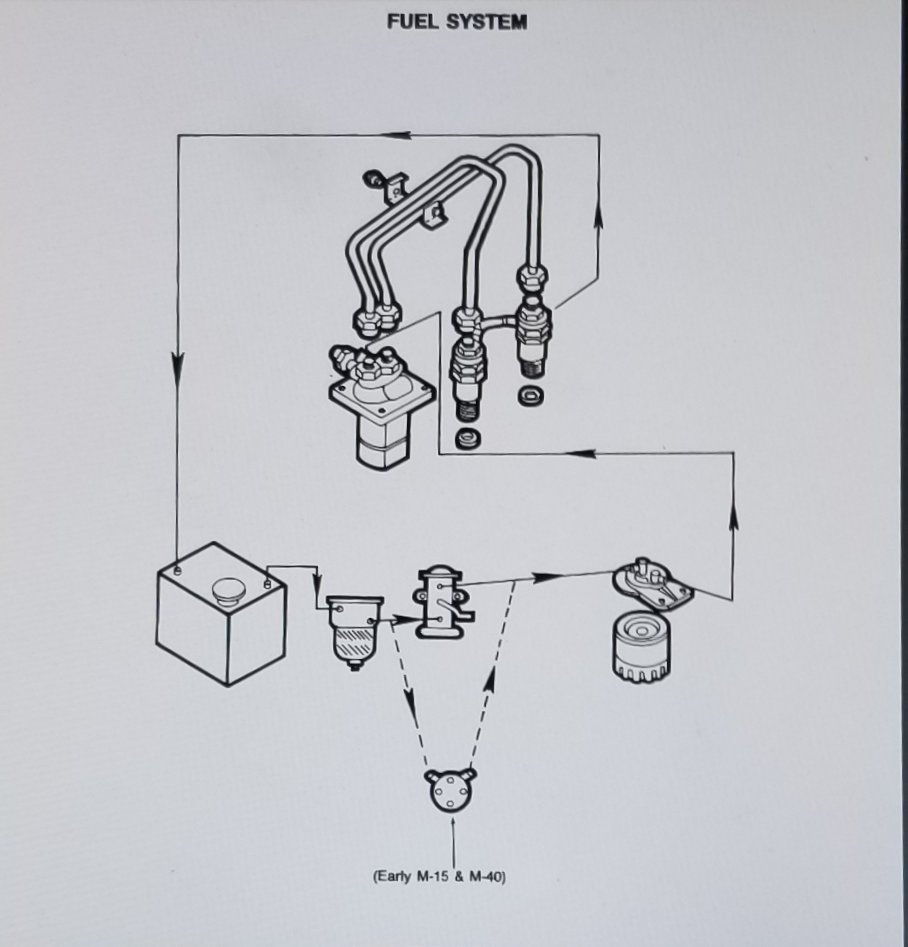
Start with the fuel tank and work your way to the injectors.Lets use my boat when I bought it as a example. Looking through the filler neck with a super bright led I can see that the fuel is lumpy, strangely discolored, and has huge irregular black islands moving across the bottom of the tank... check. Moving to the Raycor fuel water separator I can see through the lower glass that it is filled with a black waxy football...check. I could go on , but you get the idea. You wouldn't think we would have sailed her from Dana Point to Redondo, 60 to 70 miles, like that but the boat had to move. I had a secret weapon. well not much of a secret and not a weapon but a plan that worked. That's what started this minor modification.Once we got to Redondo I tackled the fuel system. Pumped out and polished the tank, flushed the fuel lines. Cleaned up the Raycor, replaced the filter in the fuel pump, and replaced the spin on fuel filter. Now to bleed the system.
- 1-20200917_111457.jpg (230.95 KiB) Viewed 7388 times
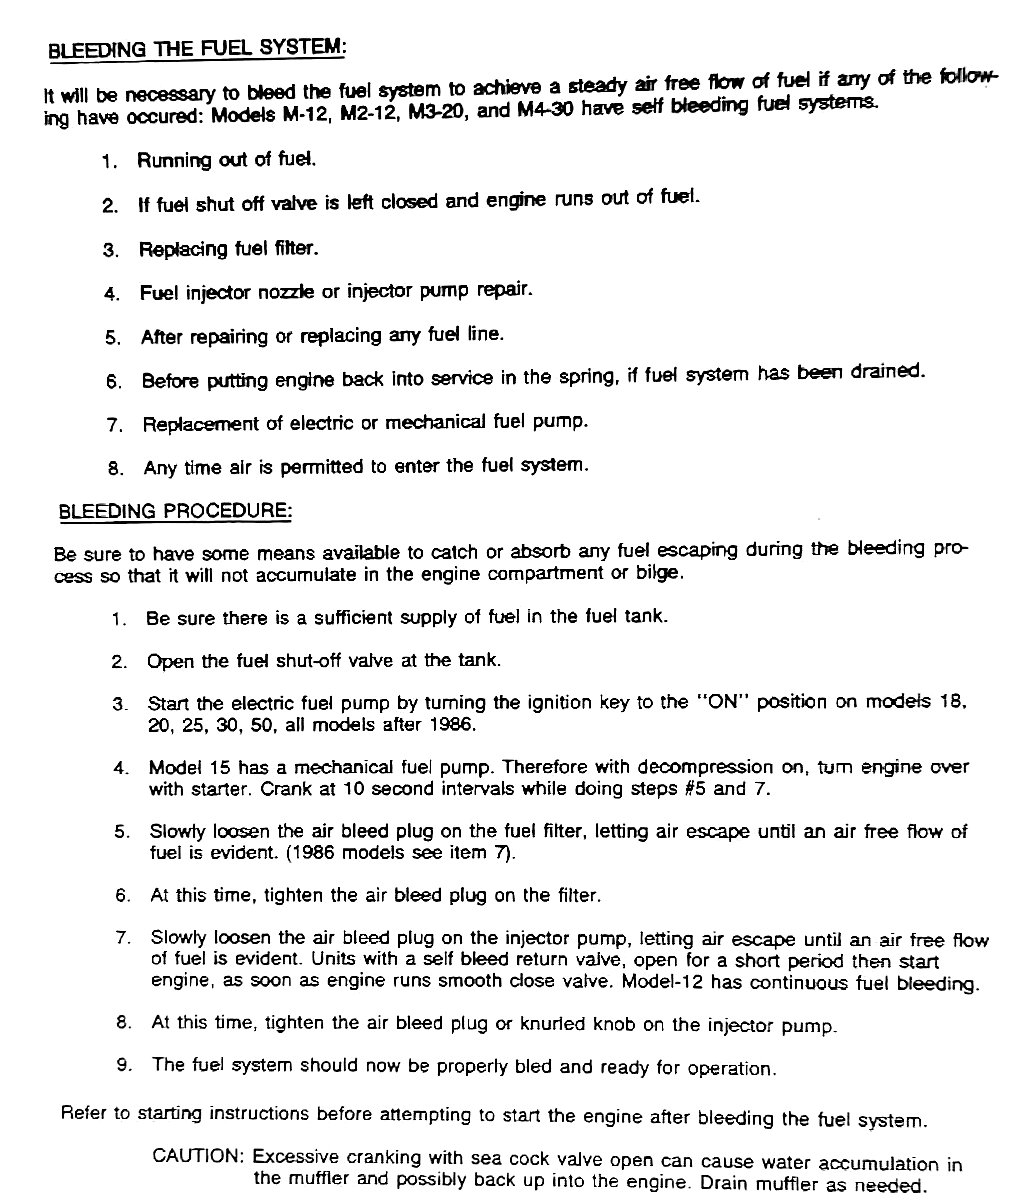
The key words here are "self bleed return valve" . Unlike many of the older diesels, the Universals have a valve instead of a bleed screw. It feeds a hose that connects to the injector fuel return line.
- 1-20200917_114718.jpg (154.84 KiB) Viewed 7388 times
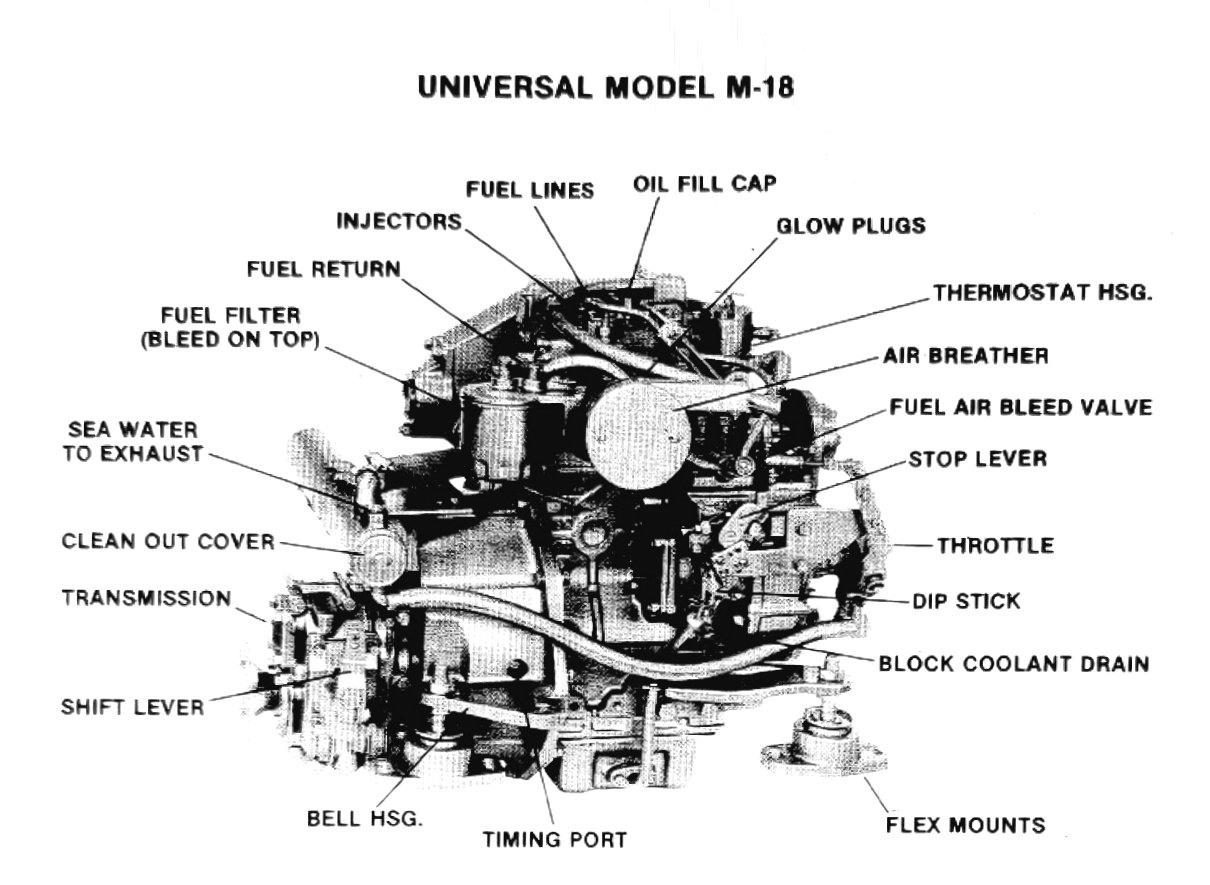
When this valve is opened the fuel pump goes to maximum output and fresh filtered fuel runs by the top of the injector pump to the injectors and back to the fuel tank (or day tank if outfitted).This flood of fuel will carry away any air bubbles or specks of crud that could stop your engine. By using this judiciously we were able to keep our engine running under extremely poor fuel conditions. Unfortunately it required me to deal with the valve on the engine and not be out navigating the boat when we were under power. So finally the light bulb moment. Install a solenoid valve just downstream of the self bleed return valve.
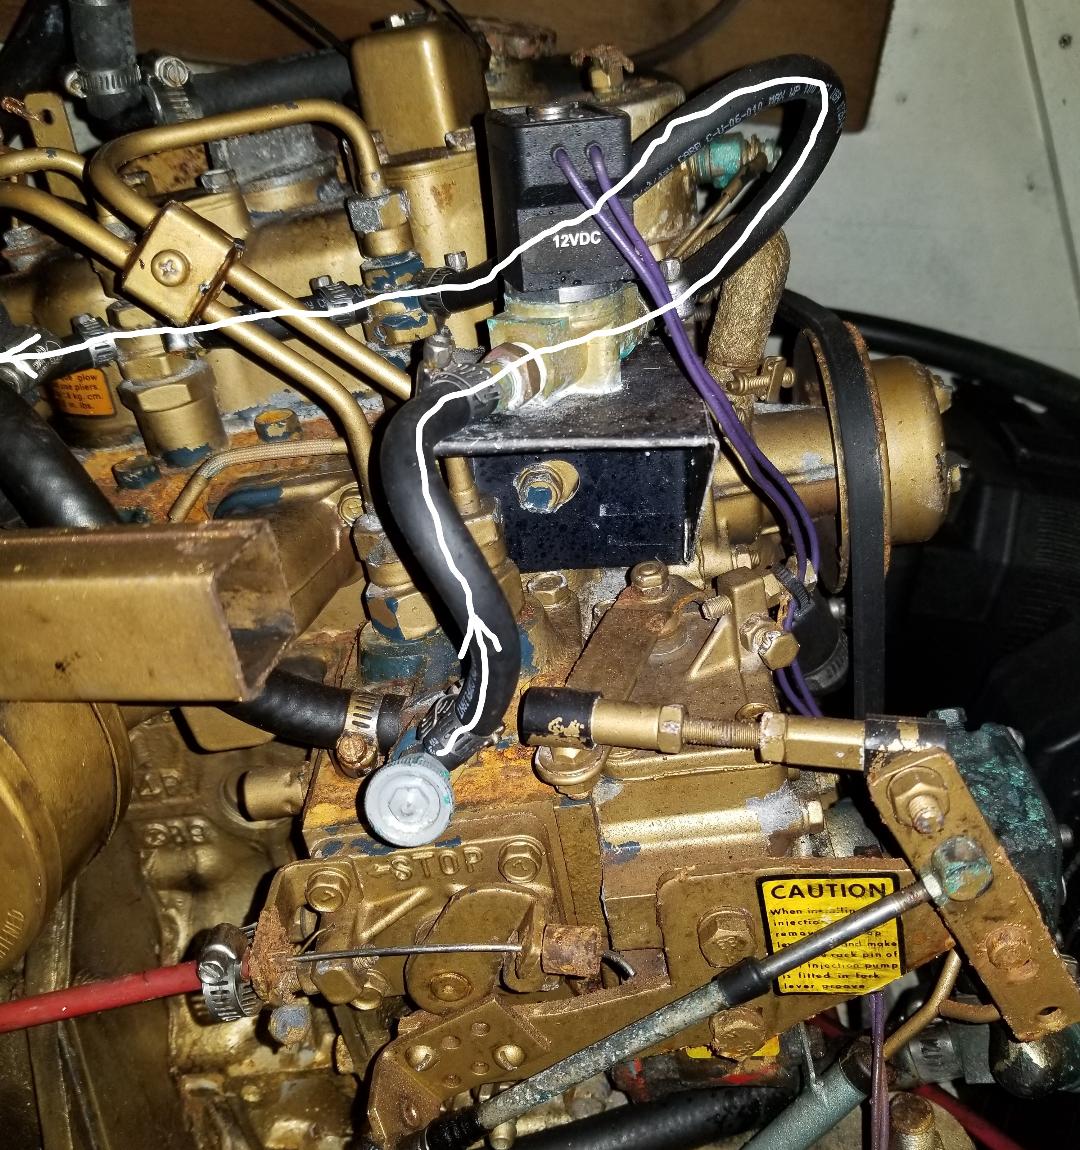
- new fuel route 2.jpg (257.98 KiB) Viewed 7388 times
This solenoid is controlled by a push pull switch next to the helm. If the engine misses or acts odd in any way, the first thing we try is the fuel bypass switch. works every time.
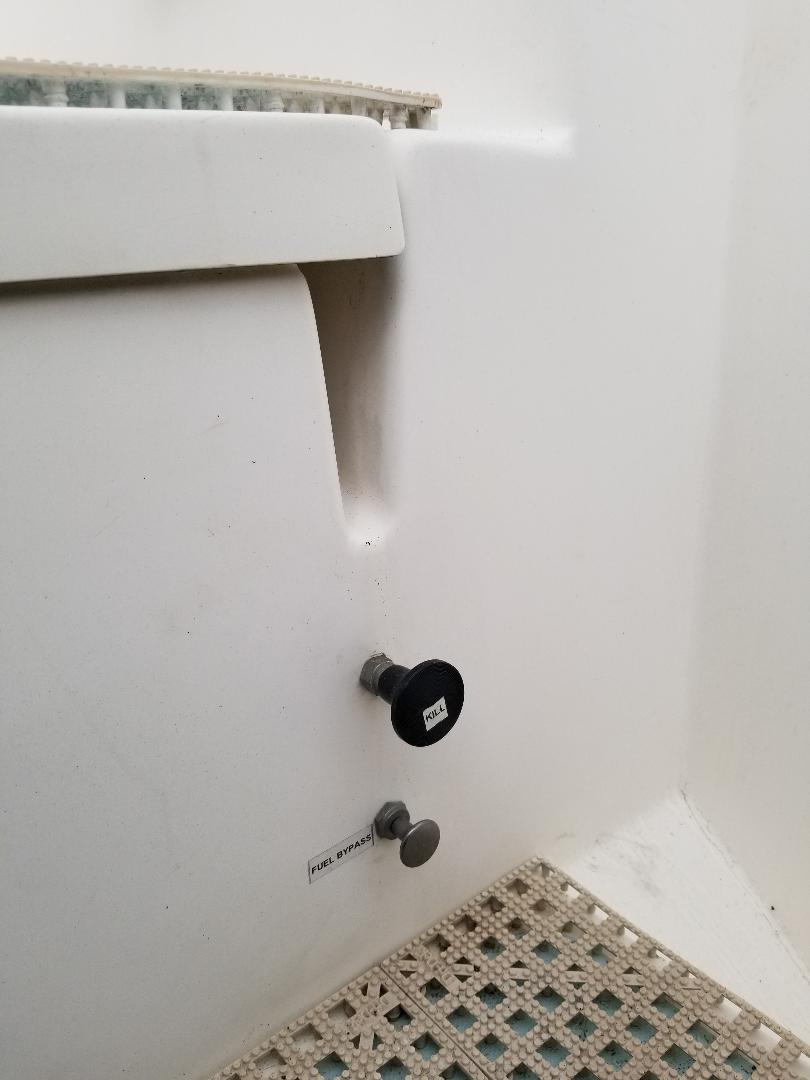
- new switch.jpg (53.47 KiB) Viewed 7388 times
The valve is just a 1/4 inch normally closed oil 12 volt solenoid. I needed to fabricate a shelf from scrap aluminum to support it.
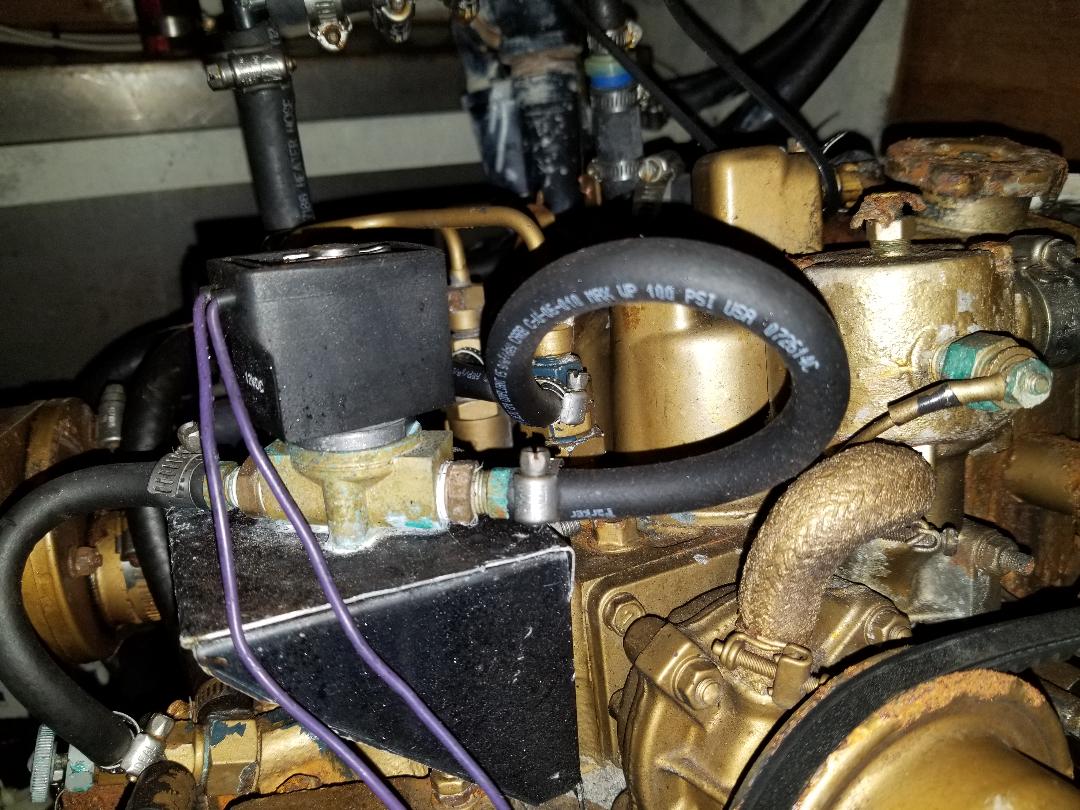
- shelf.jpg (163.62 KiB) Viewed 7388 times
One important note about this modification! Once the solenoid is in place and you have opened the valve you will be turning this short section of hose into a fully pressurized section of the fuel line.
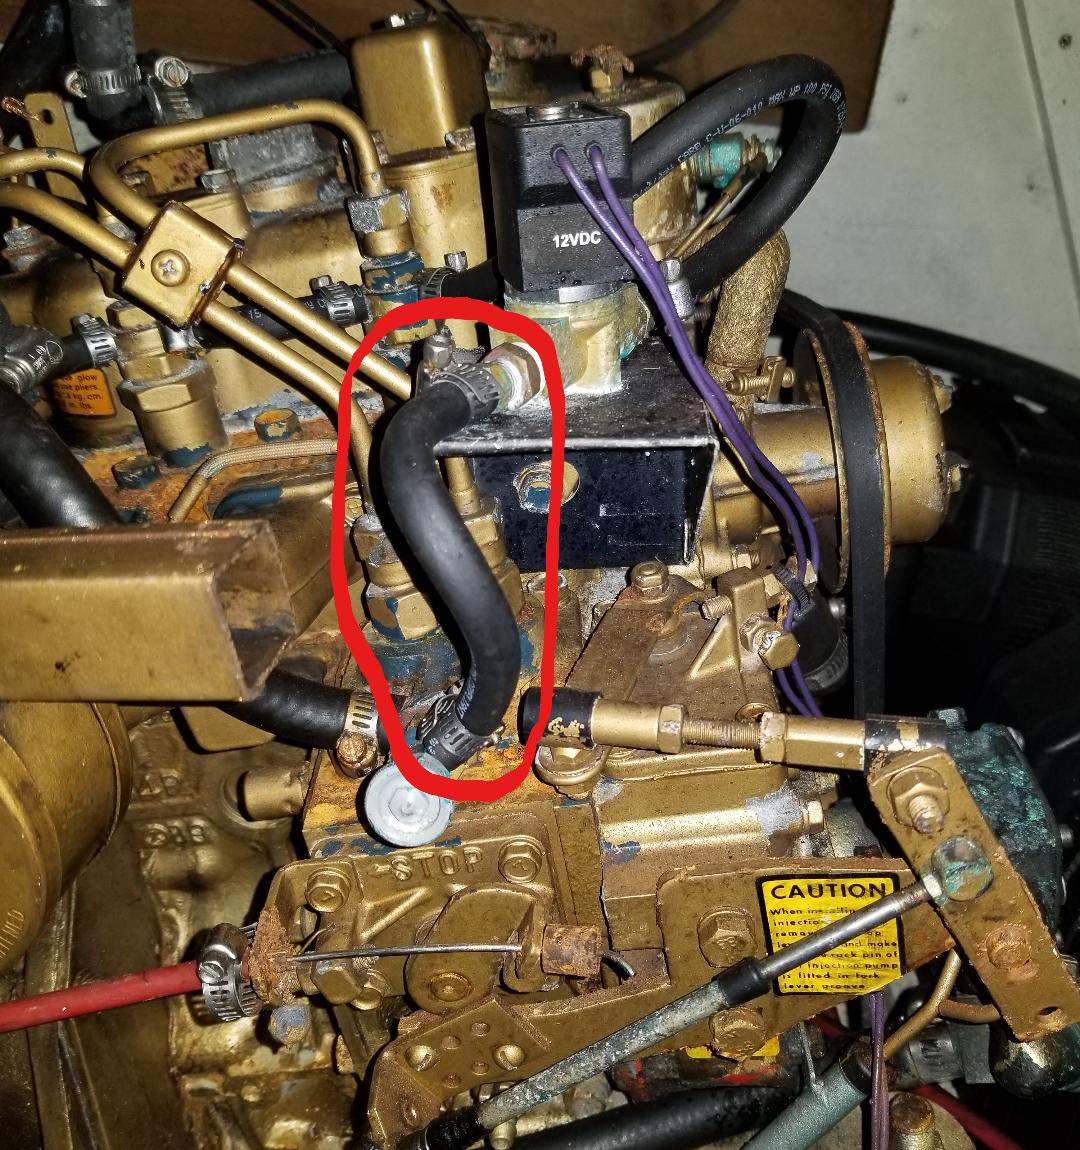
- danger.jpg (251.12 KiB) Viewed 7388 times
Do not trust this section to spring clamps or cheap hose, it is now a part of your fuel line! Cost and time to install the modification was low. I was replacing all the fuel line anyway and the solenoid was 20$ the switch 8$. Considerably less than the dinner out and a bottle of wine for the mate if I left the helm to work on the engine.

- 1-DSCN4200.JPG (102.22 KiB) Viewed 7388 times
We wish you smooth sailing.
